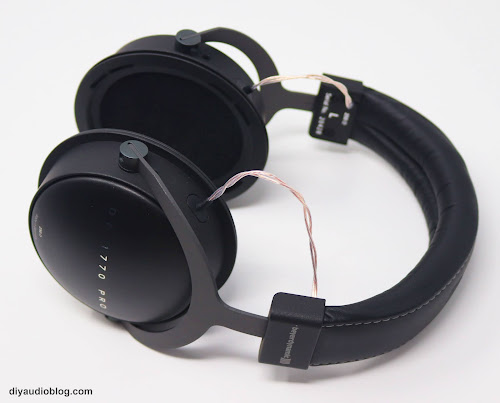
There's one glaring omission that Beyer could have done better with 1770 and 1990, and that's not using a 4-pin XLR with isolated grounds so the headphones could be run with balanced amps. For a headphone costing nearly $600 and given how little it would cost to implement is a strange business decision. Drop has actually released a version of the 1770 called the DT-177X which uses a 4 pin XLR, so I encourage anyone considering the DT-1770 to get that instead.
 |
| 3-pin XLR? That's no good! |
Fortunately for Beyer fans, the existing units can be modified for balanced amplifiers. This involves removing the 3-pin XLR and much of the existing wiring and isn't very difficult.
Below you'll see the offending 3-pin XLR which needs to be replaced. To open up the headphones, first the earpads are removed, then pry off the retaining ring using an envelope opener or similar tool.
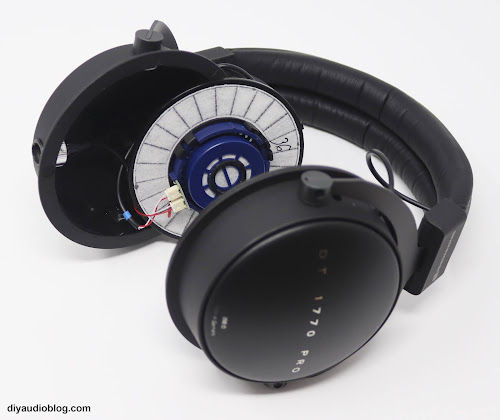
Under the retaining ring are the drivers. If you look carefully, there is a little indent on the outer edge of each. Using a small flathead screwdriver, you can apply some pressure to pry up the driver frame and remove it from the cups. This should all be done carefully as to not damage the drivers or the fabric on the driver frame.
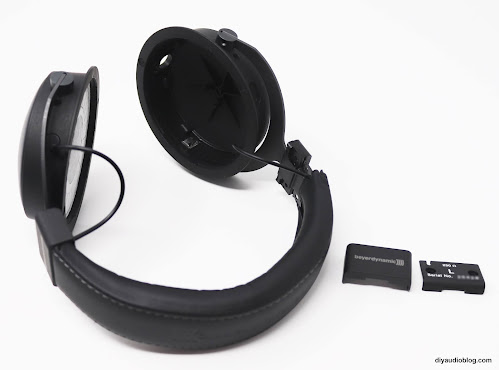
The drivers will often have a number on them. This is likely for matching purposes at the factory. In addition they will have a red dot near one of the wires. This tells you which side is positive. The wires can be trimmed and the drivers removed. Next the headband has to come off to replace the wire between the cups. There are a couple of screws to remove on the plastic brackets and you can then open up the headband and remove the wire.
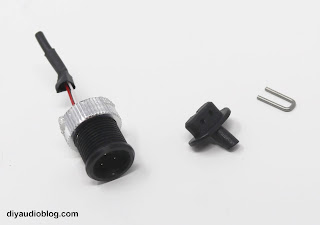
Other items that need to come off are the 3-pin mini XLR and the little strain relief pieces. The mini XLR has a plastic ring that screws it in place. There's a little bit of adhesive but it's not difficult to get off. The strain relieve pieces have a metal retaining piece, remove that and pull them out of the cup. They will need to be cleared out inside with a drill or dremel to provide clearance for thicker wire.
Once everything is out, the replacement wire is soldered to a 4 pin mini XLR (Switchcraft or similar) and is fed through the strain relief pieces (orange circle below) through the headband and out the other side. The plastic pieces holding the headband in place have small indents where the wire enters and exits (red circle below). Inside, a zip tie should be placed right under the strain relief so the wire can't yank on the driver connection if it gets caught, and some light adhesive can be placed, then the metal retaining piece can be reinserted.
Once everything is in place, you can insert the mini XLR back into the cavity on the bottom of the cup and screw on the stock plastic ring. Use a bit of adhesive or Loctite to ensure this does not come undone.
Below you'll see the wire running to one of the headphone drivers. Beyerdynamic is now using small pins and a circuit board for ease of assembly. The pins are too small to solder to directly, so the wire should be soldered close to the board with a little bit of room for flexibility. Adhesive heatshrink should be used to prevent shorting.
If you decide to try and remove the pin jacks and solder directly to the PCB, be very careful as you can damage the diaphragm wire which is quite thin. I personally do not recommend this as you'll likely find yourself buying a new set of drivers, but if you'd like to try it, godspeed.
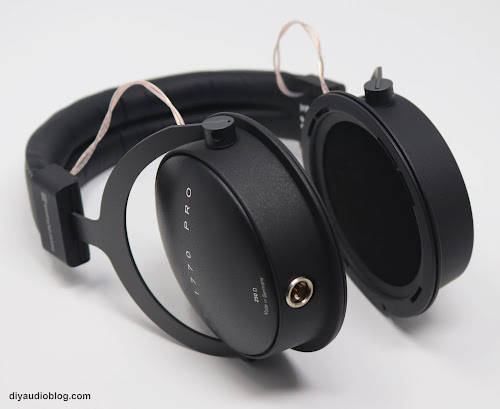
Once you have everything in place, you can reassemble the headphone. Below you'll see the modded DT1770 Pro (sans earpads, they were retained by the owner) and a spiffy new Zynsonix Ballista cable to go with them.
I hope you enjoyed this brief tutorial and hope your mod goes well. If you'd prefer someone else have all the fun, please contact Zynsonix Audio who would be happy to handle it for you.
Disclosure: Please remember that using a soldering iron and/or modifying headphones can be dangerous to you and/or your surroundings and should only be performed by a certified technician. The owner of this blog and all associated parties can not / will not be held responsible if you attempt a modification posted above and cause physical harm to yourself or your surroundings.


